HOME
Notebooks Cover to coverStoriesContributorsCategoriesKeywords
Drawings/Watercolours ContributorsCategoriesKeywords
Digital George Stow Images
Contributors |xam contributors!kun contributorsResearchers
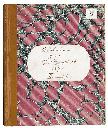
Image File: A2_1_23_FRTCV.JPG
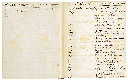
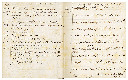
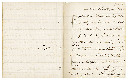
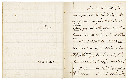
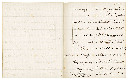
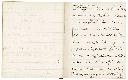
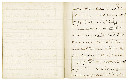
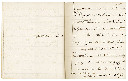
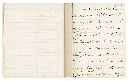
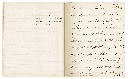
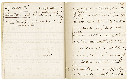
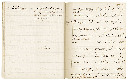
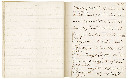
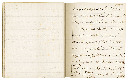
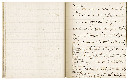
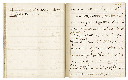
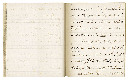
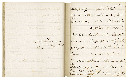
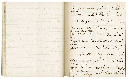
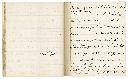
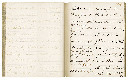
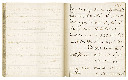
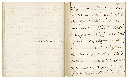
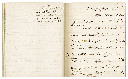
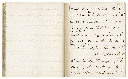
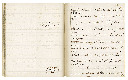
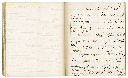
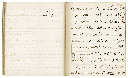
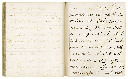
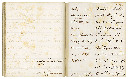
Story: Covers and first pages of Lloyd's Book II-17 or BC151_A2_1_023
Image File: A2_1_23_CON01.JPG
Image File: A2_1_23_CON02.JPG
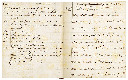
Image File: A2_1_23_01554.JPG
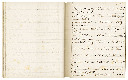
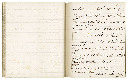
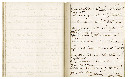
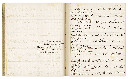
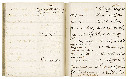
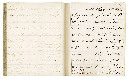
Story: Lions
Image File: A2_1_23_01555.JPG
Image File: A2_1_23_01556.JPG
Image File: A2_1_23_01557.JPG
Image File: A2_1_23_01558.JPG
Image File: A2_1_23_01559.JPG
Image File: A2_1_23_01560.JPG
Image File: A2_1_23_01561.JPG
Image File: A2_1_23_01562.JPG
Image File: A2_1_23_01563.JPG
Image File: A2_1_23_01564.JPG
Image File: A2_1_23_01565.JPG
Image File: A2_1_23_01566.JPG
Image File: A2_1_23_01567.JPG
Image File: A2_1_23_01568.JPG
Image File: A2_1_23_01569.JPG
Image File: A2_1_23_01570.JPG
Image File: A2_1_23_01571.JPG
Image File: A2_1_23_01572.JPG
Image File: A2_1_23_01573.JPG
Image File: A2_1_23_01574.JPG
Image File: A2_1_23_01575.JPG
Image File: A2_1_23_01576.JPG
Image File: A2_1_23_01577.JPG
Image File: A2_1_23_01578.JPG
Image File: A2_1_23_01579.JPG
Image File: A2_1_23_01580.JPG
Image File: A2_1_23_01581.JPG
Image File: A2_1_23_01582.JPG
Image File: A2_1_23_01583.JPG
Image File: A2_1_23_01584.JPG
Image File: A2_1_23_01585.JPG
Image File: A2_1_23_01586.JPG
Image File: A2_1_23_01587.JPG
Image File: A2_1_23_01588.JPG
Image File: A2_1_23_01589.JPG
Image File: A2_1_23_01590.JPG
Image File: A2_1_23_01591.JPG
Image File: A2_1_23_01592.JPG
Image File: A2_1_23_01593.JPG
Image File: A2_1_23_01594.JPG
Image File: A2_1_23_01595.JPG
Image File: A2_1_23_01596.JPG
Image File: A2_1_23_01597.JPG
Image File: A2_1_23_01598.JPG
Image File: A2_1_23_01599.JPG
Image File: A2_1_23_01600.JPG
Image File: A2_1_23_01601.JPG
Image File: A2_1_23_01602.JPG
Image File: A2_1_23_01603.JPG
Image File: A2_1_23_01604.JPG
Image File: A2_1_23_01605.JPG
Image File: A2_1_23_01606.JPG
Image File: A2_1_23_01607.JPG
Image File: A2_1_23_01608.JPG
Image File: A2_1_23_01609.JPG
Image File: A2_1_23_01610.JPG
Image File: A2_1_23_01611.JPG
Image File: A2_1_23_01612.JPG
Image File: A2_1_23_01613.JPG
Image File: A2_1_23_01614.JPG
Image File: A2_1_23_01615.JPG
Image File: A2_1_23_01616.JPG
Image File: A2_1_23_01617.JPG
Image File: A2_1_23_01618.JPG
Image File: A2_1_23_01619.JPG
Image File: A2_1_23_01620.JPG
Image File: A2_1_23_01621.JPG
Image File: A2_1_23_01622.JPG
Image File: A2_1_23_BCKCV.JPG
Image File: A2_1_23_SPINE.JPG