The Digital Bleek & Lloyd

Notebooks

Book: BC_151_A2_1_054

Collection: Lucy Lloyd |xam notebooks

Page Range: A2_1_54_04253.JPG - A2_1_54_043441_2.JPG

Image File: A2_1_54_FRTCV.JPG

Story: Covers and first pages of Lloyd's Book V-5 or BC151_A2_1_054

Image File: A2_1_54_INFRT.JPG

Story: Covers and first pages of Lloyd's Book V-5 or BC151_A2_1_054

Image File: A2_1_54_CON01.JPG

Story: Covers and first pages of Lloyd's Book V-5 or BC151_A2_1_054

Image File: A2_1_54_CON02.JPG

Story: Covers and first pages of Lloyd's Book V-5 or BC151_A2_1_054

Image File: A2_1_54_04253.JPG

Story: How the Jackal deceived the Hyena

Image File: A2_1_54_04254.JPG

Story: How the Jackal deceived the Hyena

Image File: A2_1_54_04255.JPG

Story: How the Jackal deceived the Hyena

Image File: A2_1_54_04256.JPG

Story: How the Jackal deceived the Hyena

Image File: A2_1_54_04257.JPG

Story: How the Jackal deceived the Hyena

Image File: A2_1_54_04258.JPG

Story: How the Jackal deceived the Hyena

Image File: A2_1_54_04259.JPG

Story: How the Jackal deceived the Hyena

Image File: A2_1_54_04260.JPG

Story: How the Jackal deceived the Hyena

Image File: A2_1_54_04261.JPG

Story: How the Jackal deceived the Hyena

Image File: A2_1_54_04262.JPG

Story: How the Jackal deceived the Hyena

Image File: A2_1_54_04263.JPG

Story: How the Jackal deceived the Hyena

Image File: A2_1_54_04264.JPG

Story: How the Jackal deceived the Hyena

Image File: A2_1_54_04265.JPG

Story: The story of the Ratel (or Mellivora) and the Waterskilpad

Image File: A2_1_54_04266.JPG

Story: The story of the Ratel (or Mellivora) and the Waterskilpad

Image File: A2_1_54_04267.JPG

Story: The story of the Ratel (or Mellivora) and the Waterskilpad

Image File: A2_1_54_04268.JPG

Story: The story of the Ratel (or Mellivora) and the Waterskilpad

Image File: A2_1_54_04269.JPG

Story: The story of the Ratel (or Mellivora) and the Waterskilpad

Image File: A2_1_54_04270.JPG

Story: The story of the Ratel (or Mellivora) and the Waterskilpad

Image File: A2_1_54_04271.JPG

Story: The story of the Ratel (or Mellivora) and the Waterskilpad

Image File: A2_1_54_04272.JPG

Story: The story of the Ratel (or Mellivora) and the Waterskilpad

Image File: A2_1_54_04273.JPG

Story: The story of the Ratel (or Mellivora) and the Waterskilpad

Image File: A2_1_54_04274.JPG

Story: The story of the Ratel (or Mellivora) and the Waterskilpad

Image File: A2_1_54_04275.JPG

Story: The story of the Ratel (or Mellivora) and the Waterskilpad

Image File: A2_1_54_04276.JPG

Story: The story of the Ratel (or Mellivora) and the Waterskilpad

Image File: A2_1_54_04277.JPG

Story: The story of the Ratel (or Mellivora) and the Waterskilpad

Image File: A2_1_54_04278.JPG

Story: The story of the Ratel (or Mellivora) and the Waterskilpad

Image File: A2_1_54_04279.JPG

Story: The story of the Ratel (or Mellivora) and the Waterskilpad

Image File: A2_1_54_04280.JPG

Story: The story of the Ratel (or Mellivora) and the Waterskilpad

Image File: A2_1_54_04281.JPG

Story: The story of the Ratel (or Mellivora) and the Waterskilpad

Image File: A2_1_54_04282.JPG

Story: The story of the Ratel (or Mellivora) and the Waterskilpad

Image File: A2_1_54_04283.JPG

Story: The story of the Ratel (or Mellivora) and the Waterskilpad

Image File: A2_1_54_04284.JPG

Story: The story of the Ratel (or Mellivora) and the Waterskilpad

Image File: A2_1_54_04285.JPG

Story: The story of the Ratel (or Mellivora) and the Waterskilpad

Image File: A2_1_54_04286.JPG

Story: The story of the Ratel (or Mellivora) and the Waterskilpad

Image File: A2_1_54_04287.JPG

Story: The story of the Ratel (or Mellivora) and the Waterskilpad

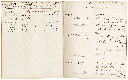
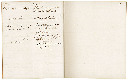
Image File: A2_1_54_04288.JPG

Story: A further explanation of the ratel (or Mellivora): why it is like a man

Image File: A2_1_54_04289.JPG

Story: A further explanation of the ratel (or Mellivora): why it is like a man

Image File: A2_1_54_04290.JPG

Story: A further explanation of the ratel (or Mellivora): why it is like a man

Image File: A2_1_54_04291.JPG

Story: A further explanation of the ratel (or Mellivora): why it is like a man

Image File: A2_1_54_04292.JPG

Story: The story of the Kwa-kkwara

Image File: A2_1_54_04293.JPG

Story: The story of the Kwa-kkwara

Image File: A2_1_54_04294.JPG

Story: The story of the Kwa-kkwara

Image File: A2_1_54_04295.JPG

Story: The story of the Kwa-kkwara

Image File: A2_1_54_04296.JPG

Story: The story of the Kwa-kkwara

Image File: A2_1_54_04297.JPG

Story: The story of the Kwa-kkwara

Image File: A2_1_54_04298.JPG

Story: The story of the Kwa-kkwara

Image File: A2_1_54_04299.JPG

Story: The story of the Kwa-kkwara

Image File: A2_1_54_04300.JPG

Story: The story of the Kwa-kkwara

Image File: A2_1_54_04301.JPG

Story: The story of the Kwa-kkwara

Image File: A2_1_54_04302.JPG

Story: The story of the Kwa-kkwara

Image File: A2_1_54_04303.JPG

Story: The story of the Kwa-kkwara

Image File: A2_1_54_04304.JPG

Story: The story of the Kwa-kkwara

Image File: A2_1_54_04305.JPG

Story: The story of the Kwa-kkwara

Image File: A2_1_54_04306.JPG

Story: The story of the Kwa-kkwara

Image File: A2_1_54_04307.JPG

Story: The story of the Kwa-kkwara

Image File: A2_1_54_04308.JPG

Story: The story of the Kwa-kkwara

Image File: A2_1_54_04309.JPG

Story: The story of the Kwa-kkwara

Image File: A2_1_54_04310.JPG

Story: The story of the Kwa-kkwara

Image File: A2_1_54_04311.JPG

Story: The story of the Kwa-kkwara

Image File: A2_1_54_04312.JPG

Story: The story of the Kwa-kkwara

Image File: A2_1_54_04313.JPG

Story: The story of the Kwa-kkwara

Image File: A2_1_54_04314.JPG

Story: The story of the Kwa-kkwara

Image File: A2_1_54_04315.JPG

Story: The story of the Kwa-kkwara

Image File: A2_1_54_04316.JPG

Story: The story of the Kwa-kkwara

Image File: A2_1_54_04317.JPG

Story: The story of the Kwa-kkwara

Image File: A2_1_54_04318.JPG

Story: The story of the Kwa-kkwara

Image File: A2_1_54_04319.JPG

Story: The story of the Kwa-kkwara

Image File: A2_1_54_04320.JPG

Story: The story of the Kwa-kkwara

Image File: A2_1_54_04321.JPG

Story: The story of the Lions and the Ostriches

Image File: A2_1_54_04322.JPG

Story: The story of the Lions and the Ostriches

Image File: A2_1_54_04324.JPG

Story: The story of the Lions and the Ostriches

Image File: A2_1_54_04325.JPG

Story: The story of the Lions and the Ostriches

Image File: A2_1_54_04326.JPG

Story: The story of the Lions and the Ostriches

Image File: A2_1_54_04327.JPG

Story: The story of the Lions and the Ostriches

Image File: A2_1_54_04328.JPG

Story: The story of the Lions and the Ostriches

Image File: A2_1_54_04329.JPG

Story: The story of the Lions and the Ostriches

Image File: A2_1_54_04330.JPG

Story: The story of the Lions and the Ostriches

Image File: A2_1_54_04331.JPG

Story: The story of the Lions and the Ostriches

Image File: A2_1_54_04332.JPG

Story: The story of the Lions and the Ostriches

Image File: A2_1_54_04333.JPG

Story: The story of the Lions and the Ostriches

Image File: A2_1_54_04334.JPG

Story: The story of the Lions and the Ostriches

Image File: A2_1_54_04335.JPG

Story: The story of the Lions and the Ostriches

Image File: A2_1_54_04336.JPG

Story: The story of the Lions and the Ostriches

Image File: A2_1_54_04337.JPG

Story: The story of the Lions and the Ostriches

Image File: A2_1_54_04338.JPG

Story: The story of the Lions and the Ostriches

Image File: A2_1_54_04339.JPG

Story: The story of the Lions and the Ostriches

Image File: A2_1_54_04340.JPG

Story: The story of the Lions and the Ostriches

Image File: A2_1_54_04341.JPG

Story: The story of the Lions and the Ostriches

Image File: A2_1_54_04342.JPG

Story: The story of the Lions and the Ostriches

Image File: A2_1_54_04343.JPG

Story: The story of the Lions and the Ostriches

Image File: A2_1_54_04344.JPG

Story: The story of the Lions and the Ostriches

Image File: A2_1_54_043441_2.JPG

Story: The story of the Lions and the Ostriches

Image File: A2_1_54_BCKCV.JPG

Story: Covers and first pages of Lloyd's Book V-5 or BC151_A2_1_054

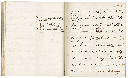
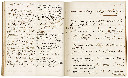
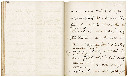
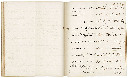
Image File: A2_1_54_SPINE.JPG